Designing a Longboard proves out to be less costly as compared to buying a top quality board. Moreover, designing your own unique Longboards is a lot of fun as you need to perform different activities. You need to be best in wood chopping and creativity skills, if you wish to design a longboard better than branded Longboards. So, let’s have a look at the steps by step guide, to design your own Longboard and let your imaginations run wild!
Collect All the Board Parts
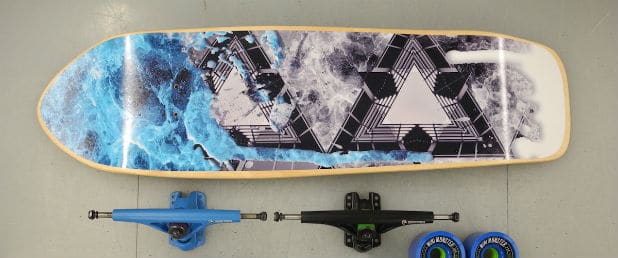
The first step is to collect all the longboard parts such as wood, bearings, wheels and trucks which are all vital parts of the board.With the board parts purchasing you should look for high-quality material which can greatly improve the overall performance .
Cut Your Board Deck to Size

Draw out the shape of your longboard on the plywood and cut it accordingly. This will help you to cut down the board deck according to the size and shape; you want your longboard to be. However, you can also purchase readymade decks from a skate shop, if you are not good at chopping skills.
Cover Your Board Deck With Layer of Polyurethane Varnish

Before proceeding further, you should cover your board deck with a layer of polyurethane varnish as it will protect your board deck from scratches. Spread the varnish all over the board with the help of a paint brush and make sure the coat is smooth. Now, keep the board in the outside area for 3-4 hours to let the varnish dry. Once the varnish is dry you can start the board building process.
Decorate Your Board

You can use sandpaper to add unique Longboards design in order to give it a natural look or consider painting your longboard. You can either use spray paint, acrylic paint, wood stain or permanent markers to paint your longboard.
Add Final Layer of Polyurethane Varnish

Adding a final layer of polyurethane varnish will help you to seal your design on the board. While, spreading a final layer of polyurethane varnish to make sure the coast is clear, so that the board design is clearly visible.
Use Grip Tape to Cover the Top of the Board

The next step is to cover the top of the board with a grip tape as it will help you to maintain your grip and balance at high speeds. So, carefully cover the board with grip tape and remove the excess tape with a blade, remember to be cautious when doing this.
Attach Board Components

The final step is to attach the board components. First of all place the bearings inside the wheels by pushing down the bearing in each wheel. The next step is to attach the wheels to the truck by sliding the wheels onto the truck. Now tight up the nuts provided with the trucks. The last step is to drill holes in the board deck to attach wheels and trucks to the longboard.
So, now your longboard is ready to use. Test your board by taking a small ride and if you find it comfortable, then you can use it to ride around the streets.
Original Post from this site